Master Soft-Boiled Eggs: Runny or Jammy Yolks Every Time
The humble egg holds endless culinary possibilities, and for many, the soft-boiled egg represents a pinnacle of simple perfection. Whether you dream of dipping crisp toast soldiers into a golden, flowing yolk or prefer the creamy, custard-like texture of a jammy center, learning
how to soft boil an egg opens up a world of delightful meals. While the process may seem similar to its hard-boiled cousin, soft boiling demands a touch more precision, turning a basic ingredient into an elegant experience. This comprehensive guide will equip you with all the knowledge, tips, and techniques to achieve your ideal soft-boiled egg, consistently and effortlessly.
The Allure of the Perfect Soft-Boiled Egg
What exactly makes a soft-boiled egg so captivating? It’s the exquisite balance between a tender, just-set white and a wonderfully liquid or semi-liquid yolk. Unlike hard-boiled eggs where the yolk is firm and fully cooked, a perfect soft-boiled egg offers a dynamic texture that enhances everything from a simple breakfast to a gourmet salad.
Depending on your preferred cooking time, you can achieve distinct yolk consistencies:
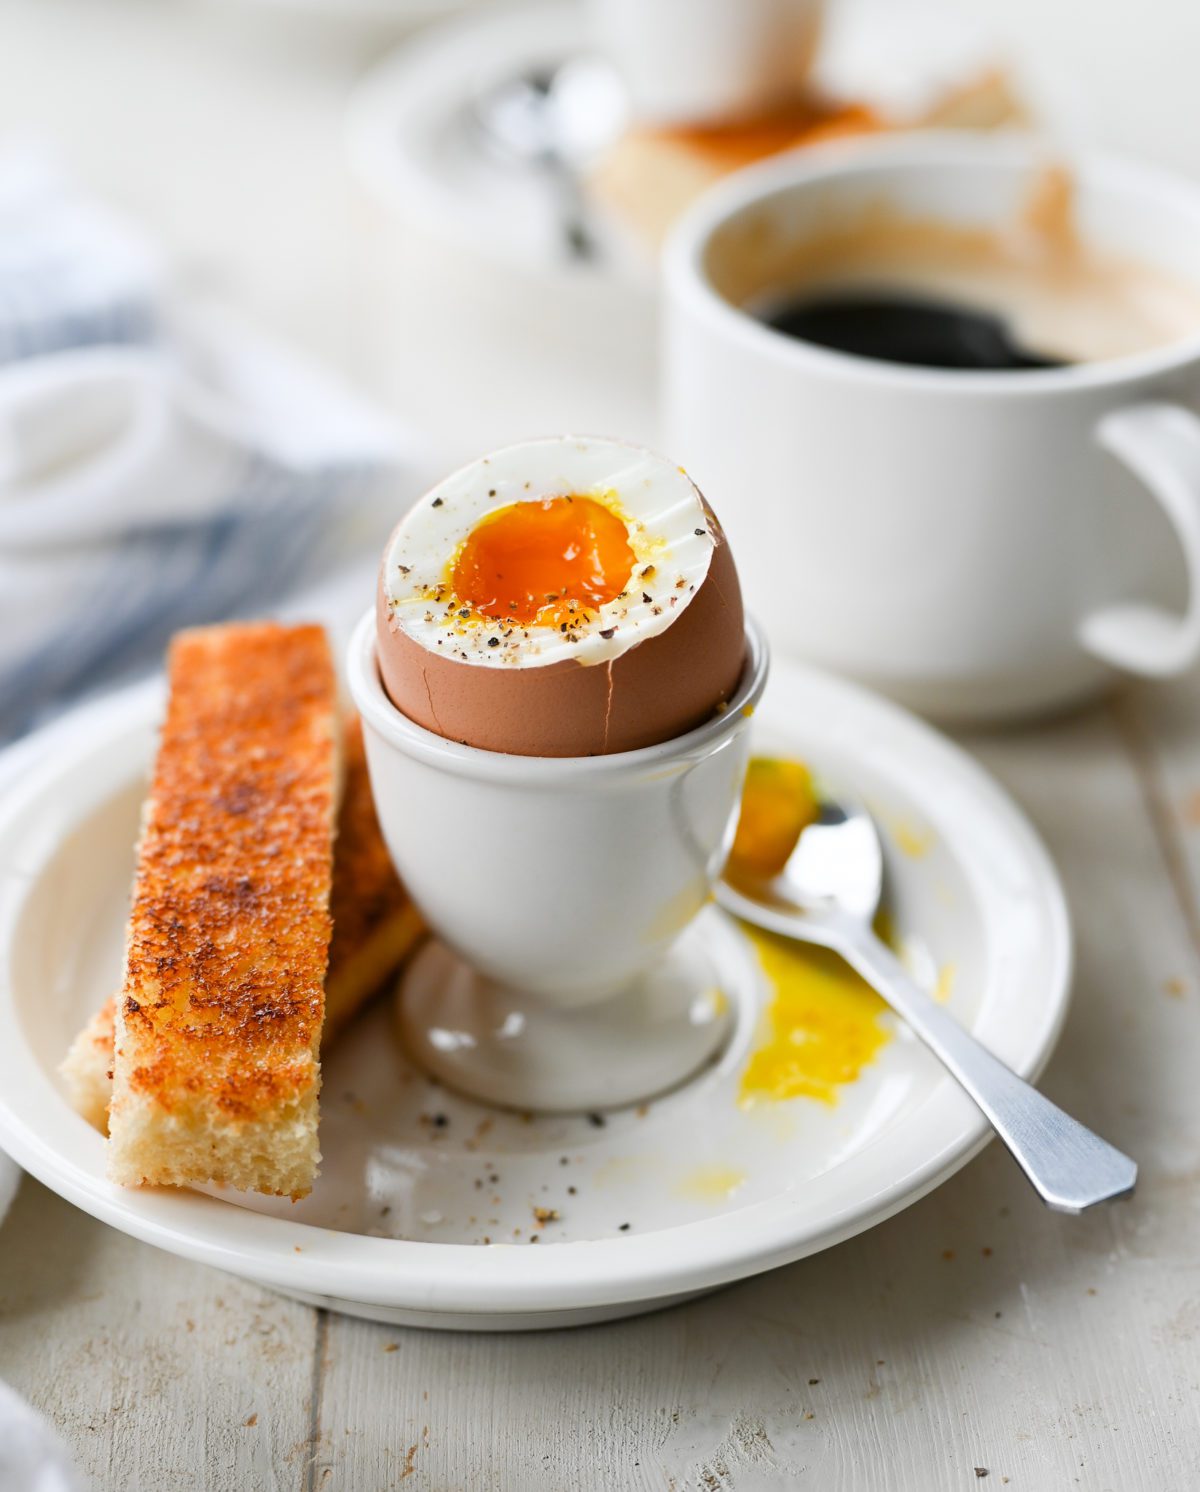
- Runny Yolk: The whites are firm but delicate, while the yolk remains completely liquid and gloriously golden. This is the classic choice for dipping toast, often served in a charming egg cup.
- Jammy Yolk: With a slightly longer cook time, the yolk transforms into a thick, spoonable, and irresistibly creamy texture, similar to a rich custard. It’s less messy than a runny yolk but just as flavorful, ideal for topping ramen bowls, salads, or avocado toast.
- Set Whites: Regardless of yolk consistency, the whites should always be fully set and opaque, yet still tender and never rubbery.
The key to unlocking these varying textures lies in understanding how heat and time interact with the egg. Once you grasp this fundamental principle, you gain complete control over your culinary creations.
Choosing the Right Eggs for Success
While any egg *can* be soft-boiled, certain choices can significantly impact your results. Surprisingly, for soft-boiled eggs,
fresher is better. Very fresh eggs tend to hold their shape more effectively, leading to neater whites and a more visually appealing finished product. This is because the albumen (egg white) in fresh eggs is thicker, preventing it from spreading excessively.
Here are a few essential tips for selecting your eggs:
- Refrigerated Eggs are Standard: This guide assumes you’re using eggs straight from the refrigerator, which is common practice.
- Large Eggs for Timing: Most timing recommendations, including ours, are based on large-sized eggs. If you're using smaller (medium) or jumbo eggs, you'll need to adjust your cooking time slightly – typically deducting 30-60 seconds for smaller eggs or adding 30-60 seconds for larger ones.
- Avoid Odd Shapes: Steer clear of eggs with unusually thin or irregular shells. These are more prone to cracking during the cooking process, which can lead to unsightly leaks or even premature cooking of the whites.
Mastering the Methods: Cold Start vs. Hot Start
There are two primary approaches to
how to soft boil an egg, each with its own advantages. Both methods are highly effective; the best one for you will depend on your comfort level and kitchen setup. For an in-depth look at comparing these methods, check out our guide on
Cold Start vs. Hot Start: Your Guide to Perfect Soft-Boiled Eggs.
The Cold Start Method: Simplicity for Beginners
This method is often preferred by home cooks due to its straightforward nature, closely mirroring the technique for hard-boiled eggs. It's forgiving and excellent for achieving consistent results.
Here’s how to do it:
- Arrange Eggs: Carefully place your eggs in a single layer at the bottom of a saucepan. Avoid overcrowding the pan.
- Cover with Water: Pour cold water into the saucepan until the eggs are submerged by about one inch.
- Bring to a Boil: Place the saucepan on your stovetop over medium-high heat. Bring the water to a gentle, rolling boil.
- Start Timing: The moment the water begins to boil vigorously, start your timer. This is the crucial moment for precision.
- Ice Bath: As soon as the timer goes off, immediately transfer the eggs from the hot water into a prepared ice bath (a bowl of ice water).
Timing Guide (from the moment water reaches a gentle boil):
- 4 minutes: For a very runny, barely set yolk. Ideal for those who love maximum liquidity.
- 5 minutes: A perfect runny center with softly set whites. This is often the preferred timing for classic dippy eggs.
- 6 minutes: Achieve a beautiful jammy yolk – thick, spoonable, and custard-like.
- 7 minutes: Your yolk will be just set, leaning towards a medium-boiled consistency but still tender.
The Hot Start Method: Precision for the Pro
Favored in many professional kitchens for its precise timing control, the hot start method requires a bit more careful handling but can yield incredibly consistent results.
Here are the steps:
- Boil Water: Bring a pot of water to a gentle boil on the stovetop. Ensure there’s enough water to completely cover the eggs.
- Lower Eggs Carefully: Using a slotted spoon, gently lower each egg into the boiling water. This minimizes the risk of cracking the shell upon impact.
- Maintain Simmer: Once all eggs are in, adjust the heat to maintain a steady, gentle simmer – avoid a rapid, violent boil that could crack the shells or jostle the eggs too much.
- Start Timing: Begin your timer immediately after the last egg enters the water.
- Ice Bath: When your timer finishes, promptly remove the eggs and plunge them into an ice bath.
Timing Guide (from the moment eggs enter the simmering water):
- 4–5 minutes: For a deliciously runny yolk.
- 6 minutes: The sweet spot for a rich, jammy yolk.
- 7 minutes: A mostly set yolk, offering a firmer but still yielding texture.
The Crucial Steps for Flawless Results
Beyond the boiling itself, two critical steps ensure your soft-boiled eggs are not only perfectly cooked but also easy to handle and enjoy.
The Indispensable Ice Bath
Regardless of which cooking method you choose, an ice water bath is non-negotiable for achieving the perfect soft-boiled egg and making your life easier.
- Halts Cooking Instantly: The cold shock immediately stops the residual heat from continuing to cook the eggs. This prevents your delicate yolks from over-setting and becoming firmer than desired.
- Prevents Over-Set Yolks: It’s the secret weapon against those frustrating moments when a perfectly timed egg ends up slightly overcooked.
- Aids Peeling: The sudden temperature change causes the egg white to slightly contract and separate from the inner membrane, making the shell significantly easier to peel.
Allow your eggs to cool in the ice bath for at least 2-3 minutes before handling or peeling. For more in-depth secrets on achieving perfect soft-boiled eggs, including timing and peeling, explore our article:
Unlock Perfect Soft-Boiled Eggs: Timing, Peeling & Ice Bath Secrets.
Peeling Your Delicate Creation
Soft-boiled eggs are inherently more fragile than their hard-boiled counterparts, so peeling requires a gentle touch and a bit of finesse.
Best peeling tips:
- Crack All Over: Gently tap the egg all over a hard surface (like your counter) to create a network of fine cracks across the shell.
- Start at the Wider End: Begin peeling from the wider end of the egg. This is where the air pocket is located, making it easier to get under the membrane and start the peel without tearing the delicate white.
- Peel Under Running Water: For stubborn shells, peel the egg under a gentle stream of cool running water. The water helps to lubricate and wash away tiny shell fragments, making it easier to separate the shell and membrane from the egg white.
If you're serving your soft-boiled egg in an egg cup, you might not even need to peel it completely. Simply slice off the top with a knife or use an egg topper, scoop out the contents, and enjoy!
Troubleshooting and Expert Tips for Consistent Success
Even with a detailed guide, a few variables can influence your soft-boiled egg journey.
- Altitude Adjustments: At higher altitudes, water boils at a lower temperature, which means eggs will take longer to cook. You may need to add 30 seconds to a minute (or more) to your cooking times depending on your elevation.
- Pot Size & Water Volume: Consistency is key. Using the same pot with roughly the same amount of water each time can help standardize your results. This ensures the water comes to a boil or simmer at a consistent rate.
- Stove Variation: Every stovetop is different. What's "medium-high" on one stove might be "high" on another. Don't be afraid to experiment with slight timing adjustments (+/- 15-30 seconds) until you find the *perfect* timing for your specific kitchen setup and desired yolk consistency. Keep a log of your successes!
Learning
how to soft boil an egg is a rewarding skill that elevates a humble ingredient into a culinary delight. With these methods, precise timings, and expert tips, you're now equipped to create flawlessly runny or exquisitely jammy yolks every single time. Experiment with different timings to discover your personal preference, and enjoy the simple pleasure of a perfectly cooked soft-boiled egg.